An applet is the parent container that holds all components that make up the applet's graphical user interface (GUI). An Applet container is used to create an applet program. Most applets support the following functions:
- Applet programs are typically run by another program.
- Applet components typically include some built-in support for threads. (For simple applets, you do not need to consider how your applet will handle threads.)
- Applets contain methods that manage sounds, pictures, and URL addresses.
Applet programs can only write to files if the applets are located on the host system of the managing Web page. An applet can not write a file over a network.
An applet program is a self-contained block of running Java code that a Web browser launches and runs from a Web page. Applets are called using the HTML </Applet> tag. To display an applet on a Web page, use an HTML file containing a reference to your applet. In HTML, a simple applet tag looks like this:
To insert a Perspective for Java bean into an applet, do the following:
- Open a new project
- Select the BasicApplet project type
- When the Applet Form Designer window is displayed, select and drag the Perspective for Java bean from the Component Library window into the Form Designer window.
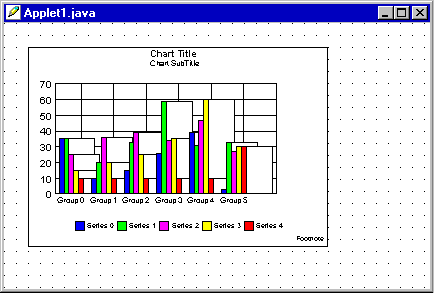
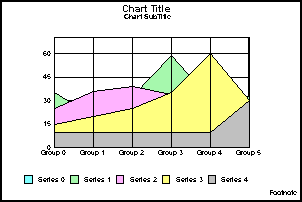
Perspective will display the default graph type (17, vertical bar) using sample data. The default configuration displays the chart in its minimum size (Height=100, Width=100). Use setBounds() to change the size and location of the chart. The following example shows a chart that has been resized (Height=200, Width=300):
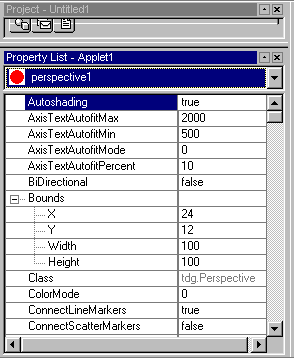
If it is not already displayed, select the Property List from the Window menu.
Selecting Properties
When Perspective for Java is displayed in an Applet window, the Property List window will display the properties that are supported by Perspective for Java. The following illustration shows the property list window displayed by Symantec VisualCafe JDE:
The procedure for displaying the Property List window may be slightly different depending on the JDE that is being used. The list of values next to each property name shows the default value of each property. To change a property, simply select the value column next to the property name and select or enter a new value. Properties that have specific values have a drop-down list from which you can select the new value. For properties that can be assigned a range of values, simply enter the new value. As long as the ManualDraw property is set to false, the chart in the applet window will be automatically updated to reflect the new property value. Use the vertical scroll bar on the right side of the property list window to display additional properties outside the display space of the window. All of the properties displayed in the Property List window are listed in Chapter 7.
Quick Tests with Properties
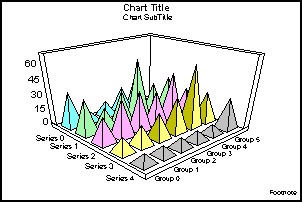
- Select the GraphType property from the Property List Window and set its value to 1. Verify that a 3D Graph Type is displayed.
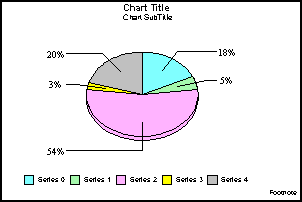
- Select the GraphType property again and set its value to 55. Verify that a pie chart is displayed.
- Select the GraphType property again and set its value to 31. Verify that a vertical area chart is displayed.
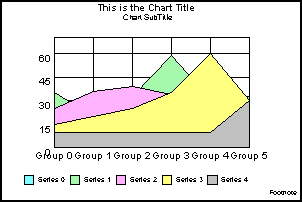
- Select the TitleString property in the Property List Window and enter "This is the Chart Title". Verify that the new title is displayed in the chart.
In the Symantec VisualCafe JDE, you may double click on the applet window to display the Java code associated with the applet. The procedure for displaying the Java code window may be different depending on the JDE that is being used. The following code segment shows the initial code that is produced before any properties or methods have been set:
EXAMPLE:
import java.awt.*;
import java.applet.*;
import tdg.Perspective;
public class Applet1 extends Applet
{
     public void init()
     {
          //{{INIT_CONTROLS
          setLayout (null);
          setSize (300,200);
          perspective1=new
          tdg.Perspective();
          perspective1.setBounds (0,0,300,200);
          add (perspective1);
          //}}
     }
          //{{DECLARE_CONTROLS
          tdg.Perspective perspective1;
          //}}

}
In the Symantec VisualCafe JDE, the Java code window includes an Events/Methods window that can be used to add outline code for event driven activities such as mouse clicks. For example, the following code outline is added to the code shown above when the mouseClicked event is selected:
EXAMPLE:
//{{REGISTER_LISTENERS
SymMouse aSymMouse = new SymMouse();
perspective1.addMouseListener (aSymMouse);
//}}
}

//{{DECLARE_CONTROLS
tdg.Perspective perspective1;
//}}

class SymMouse extends java.awt.event.MouseAdapter
{
     public void mouseClicked (java.awt.event.MouseEvent event)
     {
          Object object = event.getSource();
          if (object == perspective1) perspective1_mouseClicked (event);
     }
}

void perspective1_mouseClicked (java.awt.event.MouseEvent event)
{
     // to do: code goes here.
}
You may add Perspective for Java properties and methods to process a mouse clicked event in the perspective_mouseClicked() function by adding code at the location identified by "//to do: code goes here.".
Adding Perspective Properties to the Java Code
When properties are selected and changed in the Property List window, the associated method (set{PropertyName}) is automatically added to the Java code as shown in the following example code segment:
EXAMPLE:
/* A basic extension of the java.applet.Applet class */
import java.awt.*;
import java.applet.*;
import tdg.Perspective;
public class Applet1 extends Applet
{
     public void init()
     {
          //{{INIT_CONTROLS
          setLayout (null);
          setSize (300,200);
          perspective1 = new tdg.Perspective();
          perspective1.setDepthAngle (0);
          perspective1.setDepthRadius (0);
          perspective1.setAutoshading (false);
          perspective1.setBounds (0,0,300,200);
          add (perspective1);
          //}}
     }
     //{{DECLARE_CONTROLS
          tdg.Perspective perspective1;
     //}}
}
Adding Perspective Methods to the Java Code
You may add any Perspective methods to the Java code after the following statement:
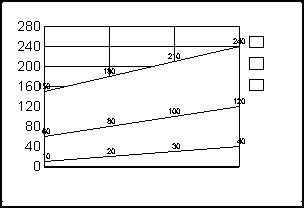
Perspective for Java methods are listed in Chapter 8. All properties may be executed as methods by adding a set or get prefix in front of the property name. If you do not want to use the sample data in the chart being developed, set the UseSampleData property to false. When this property is set false, your Java code must select a chart type and identify all data values to be imaged in the chart. The following example code segment shows the code that produces a simple vertical area chart with three series and four groups:
EXAMPLE:
import java.awt.*;
import java.applet.*;
import tdg.Perspective;
public class Applet1 extends Applet
{
     public void init()
     {
           setLayout (null);
           setSize (300,200);
           perspective1 = new tdg.Perspective();
           perspective1.setUseSampleData (false);
           perspective1.setGraphType (32); //Vertical Area Chart
           perspective1.setDepthAngle (0); //Disable 2.5D Imaging
           perspective1.setDepthRadius (0);
           perspective1.setDataTextDisplay (true); //Display data
           perspective1.setData (0,0,10); //Series 0, Group 0
           perspective1.setData (0,1,20); //Series 0, Group 1
           perspective1.setData (0,2,30); //Series 0, Group 2
           perspective1.setData (0,3,40); //Series 0, Group 3
           perspective1.setData (1,0,50); //Series 1, Group 0
           perspective1.setData (1,1,60); //Series 1, Group 1
           perspective1.setData (1,2,70); //Series 1, Group 2
           perspective1.setData (1,3,80); //Series 1, Group 3
           perspective1.setData (2,0,90); //Series 2, Group 0
           perspective1.setData (2,1,100); //Series 2, Group 1
           perspective1.setData (2,2,110); //Series 2, Group 2
           perspective1.setData (2,3,120); //Series 2, Group 3
           perspective1.setDataRangeToExtent();
           perspective1.setBounds (0,0,300,200);
           add (perspective1);
     }
     tdg.Perspective perspective1;
}
Executing the Java Code
When UseSampleData is set to false or methods have been added to the Java code window, the applet form designer window will not reflect the chart that is being defined. To execute the Java code associated with the applet and update the Perspective for Java chart display, select the Execute function from the Project menu.